
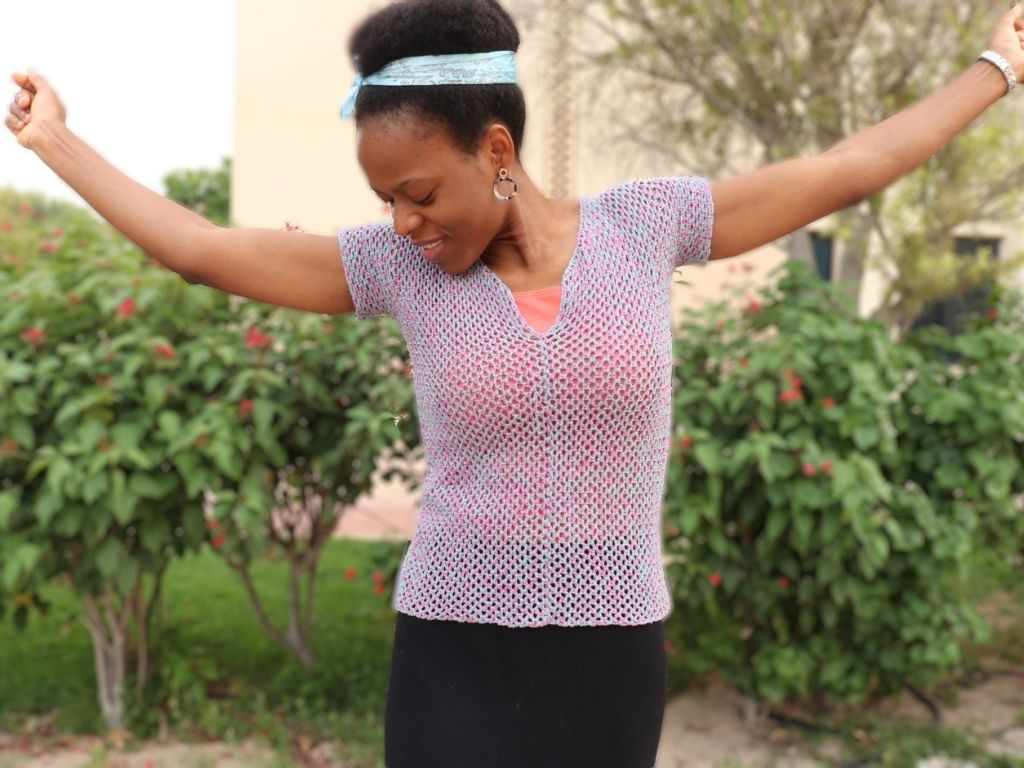
I LOVE this Summer Top Crochet pattern, so much! And I reckon you will love it too once you make one for yourself or a friend.
Purchase a Printable PDF on Ravelry, Etsy or LoveCrafts
I really like to crochet tops. If I knew how to sew I’d be sewing all my tops, but for now crocheting them will have to do for now. The chain loop summer top is one of those projects that defy the belief that because it is summer you cannot wear crocheted item, or that you should drop your hooks till Fall or Winter.
I think by now we all know that crochet is not a ‘season’ thing. There are millions of projects to crochet no matter the season. Infact, it is always better to start early, take for instance, christmas crochet projects that begin as early as june or July. You get what I mean?
This summer top crochet pattern is my new favourite because of how easy it is to pair with other garments and accessories. It is a kind of camouflage that adapts with the colour of the camisole or underwear you have under it. You will also find that it is a pretty easy pattern to make.

Purchase a Printable PDF on Ravelry, Etsy or LoveCrafts
BLOCKING YOUR CROCHET TOP
I find that this is not a common aspect for projects like tops or cardigans. It is not really necessary because the majority of patterns are loose fitting, but for tops that have a little more snug like this one, I would recommend blocking.
Another thing to consider is that with wash and wear, the top will naturally stretch (a bit), especially if they are lacey designs. This top I designed on my other blog was a loose fitting design, I went and hand-washed it and it stretched so much. Perhaps if I had washed it in the machine it would not have turned out with the extra stretch, but I still like the top.
This chain loop crochet top might be a little fitting, but you should consider that it is lacy design that has abundant stretch to it. So blocking it is optional, because with our without, it will stretch over time. In case you were wondering, the top worn in the photos was blocked.

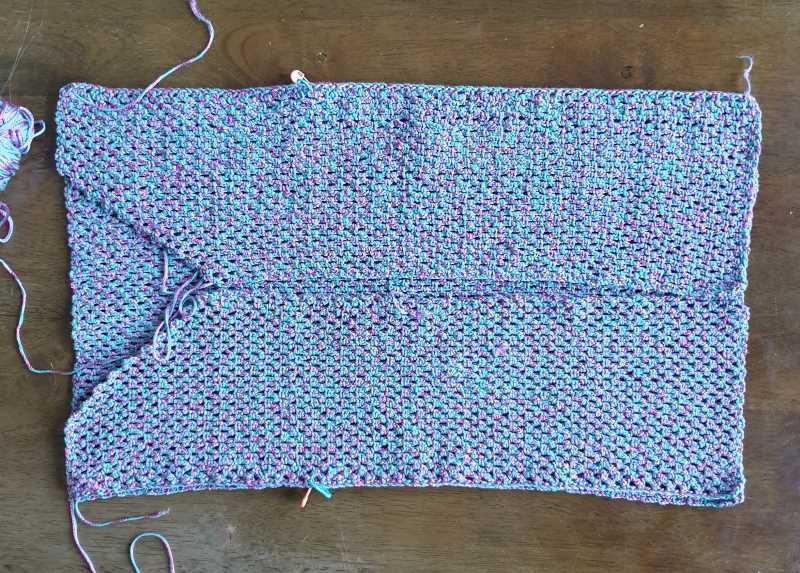
CONSTRUCTION
The chain loop summer top is one of the easiest crochet top patterns you will find out there, because it is also a top a beginner can make. If you can make chains and single crochet stitches, then you are set. All you need is the ambition to finish it.
The top is made in 3 parts, which are joined together. Now, the joining of the parts may be where you have a little hiccup. The only part joined with a tapestry needle is the shoulder, the sides and sleeves are joined in a different way that may be new to you, but have no fear I have made it as clear as possible. Plus there are photos below and a video tutorial to guide you.
YARN
What can I say, I love the result Paintbox yarns Metallic DK produces. I am a big fan of DK yarn and will not hesitate to make projects with it, even if they will take longer.
This yarn has abundant stretch to it. It is made from 55% cotton and 45% polyamide and comes in 50 gram balls. At first touch, it feels very soft, but after you stitch it up it has a bit of a rough texture (could that be the cotton?), but I’ve got no issue with this yarn. I really like it. I used it to make the sleeves and hem on this top.
If you cannot access this yarn, use a substitute that matches or is close to the gauge and has good stretch. If you intend to purchase this yarn, use this link Paintbox yarns Metallic DK.
MORE CROCHET SUMMER GARMENTS FOR YOU:
- Marynes Easy Crochet Top– pretty, light and airy design for plus size women too.
- Billows Crochet Vest– easy and stylish vest pattern for women.
- Crochet Tank Top for Boys- of course, our boys should wear crochet too.
- Crochet Summer Cover-Up- light, lacy, pretty and great for beach wear too.
- Colour Stripe Cardigan– another mesh design you will like.
SHOP YARN CRAFTEE PATTERNS
SHOP YARN CRAFTEE PATTERNS
All patterns and materials shared on www.yarncraftee.com (unless otherwise stated) are copyright Bekisu Obomighie aka Rose Obom. Please read more on the Privacy Policy page. Thank you.
CHAIN LOOP SUMMER TOP CROCHET PATTERN FOR WOMEN
Disclosure– This post may contain affiliate links; from which Yarn Craftee will receive a commission should you make a purchase.
Sizes
| Sizes | XS | S | M | L | 1XL | 2XL | 3XL | 4XL |
| Starting chains | 92 | 96 | 96 | 100 | 104 | 104 | 108 | 108 |
| Number of rows (back panel) | 66 | 70 | 74 | 78 | 82 | 86 | 90 | 94 |
| Number of rows (front panel) | 33 | 35 | 37 | 39 | 41 | 43 | 45 | 47 |
| Armhole depth (inches) | 7 | 7.5 | 7.5 | 8 | 8.5 | 8.5 | 9 | 9 |
Gauge: 8SC/Ch 3 loops= 4”, 16 rows=3”
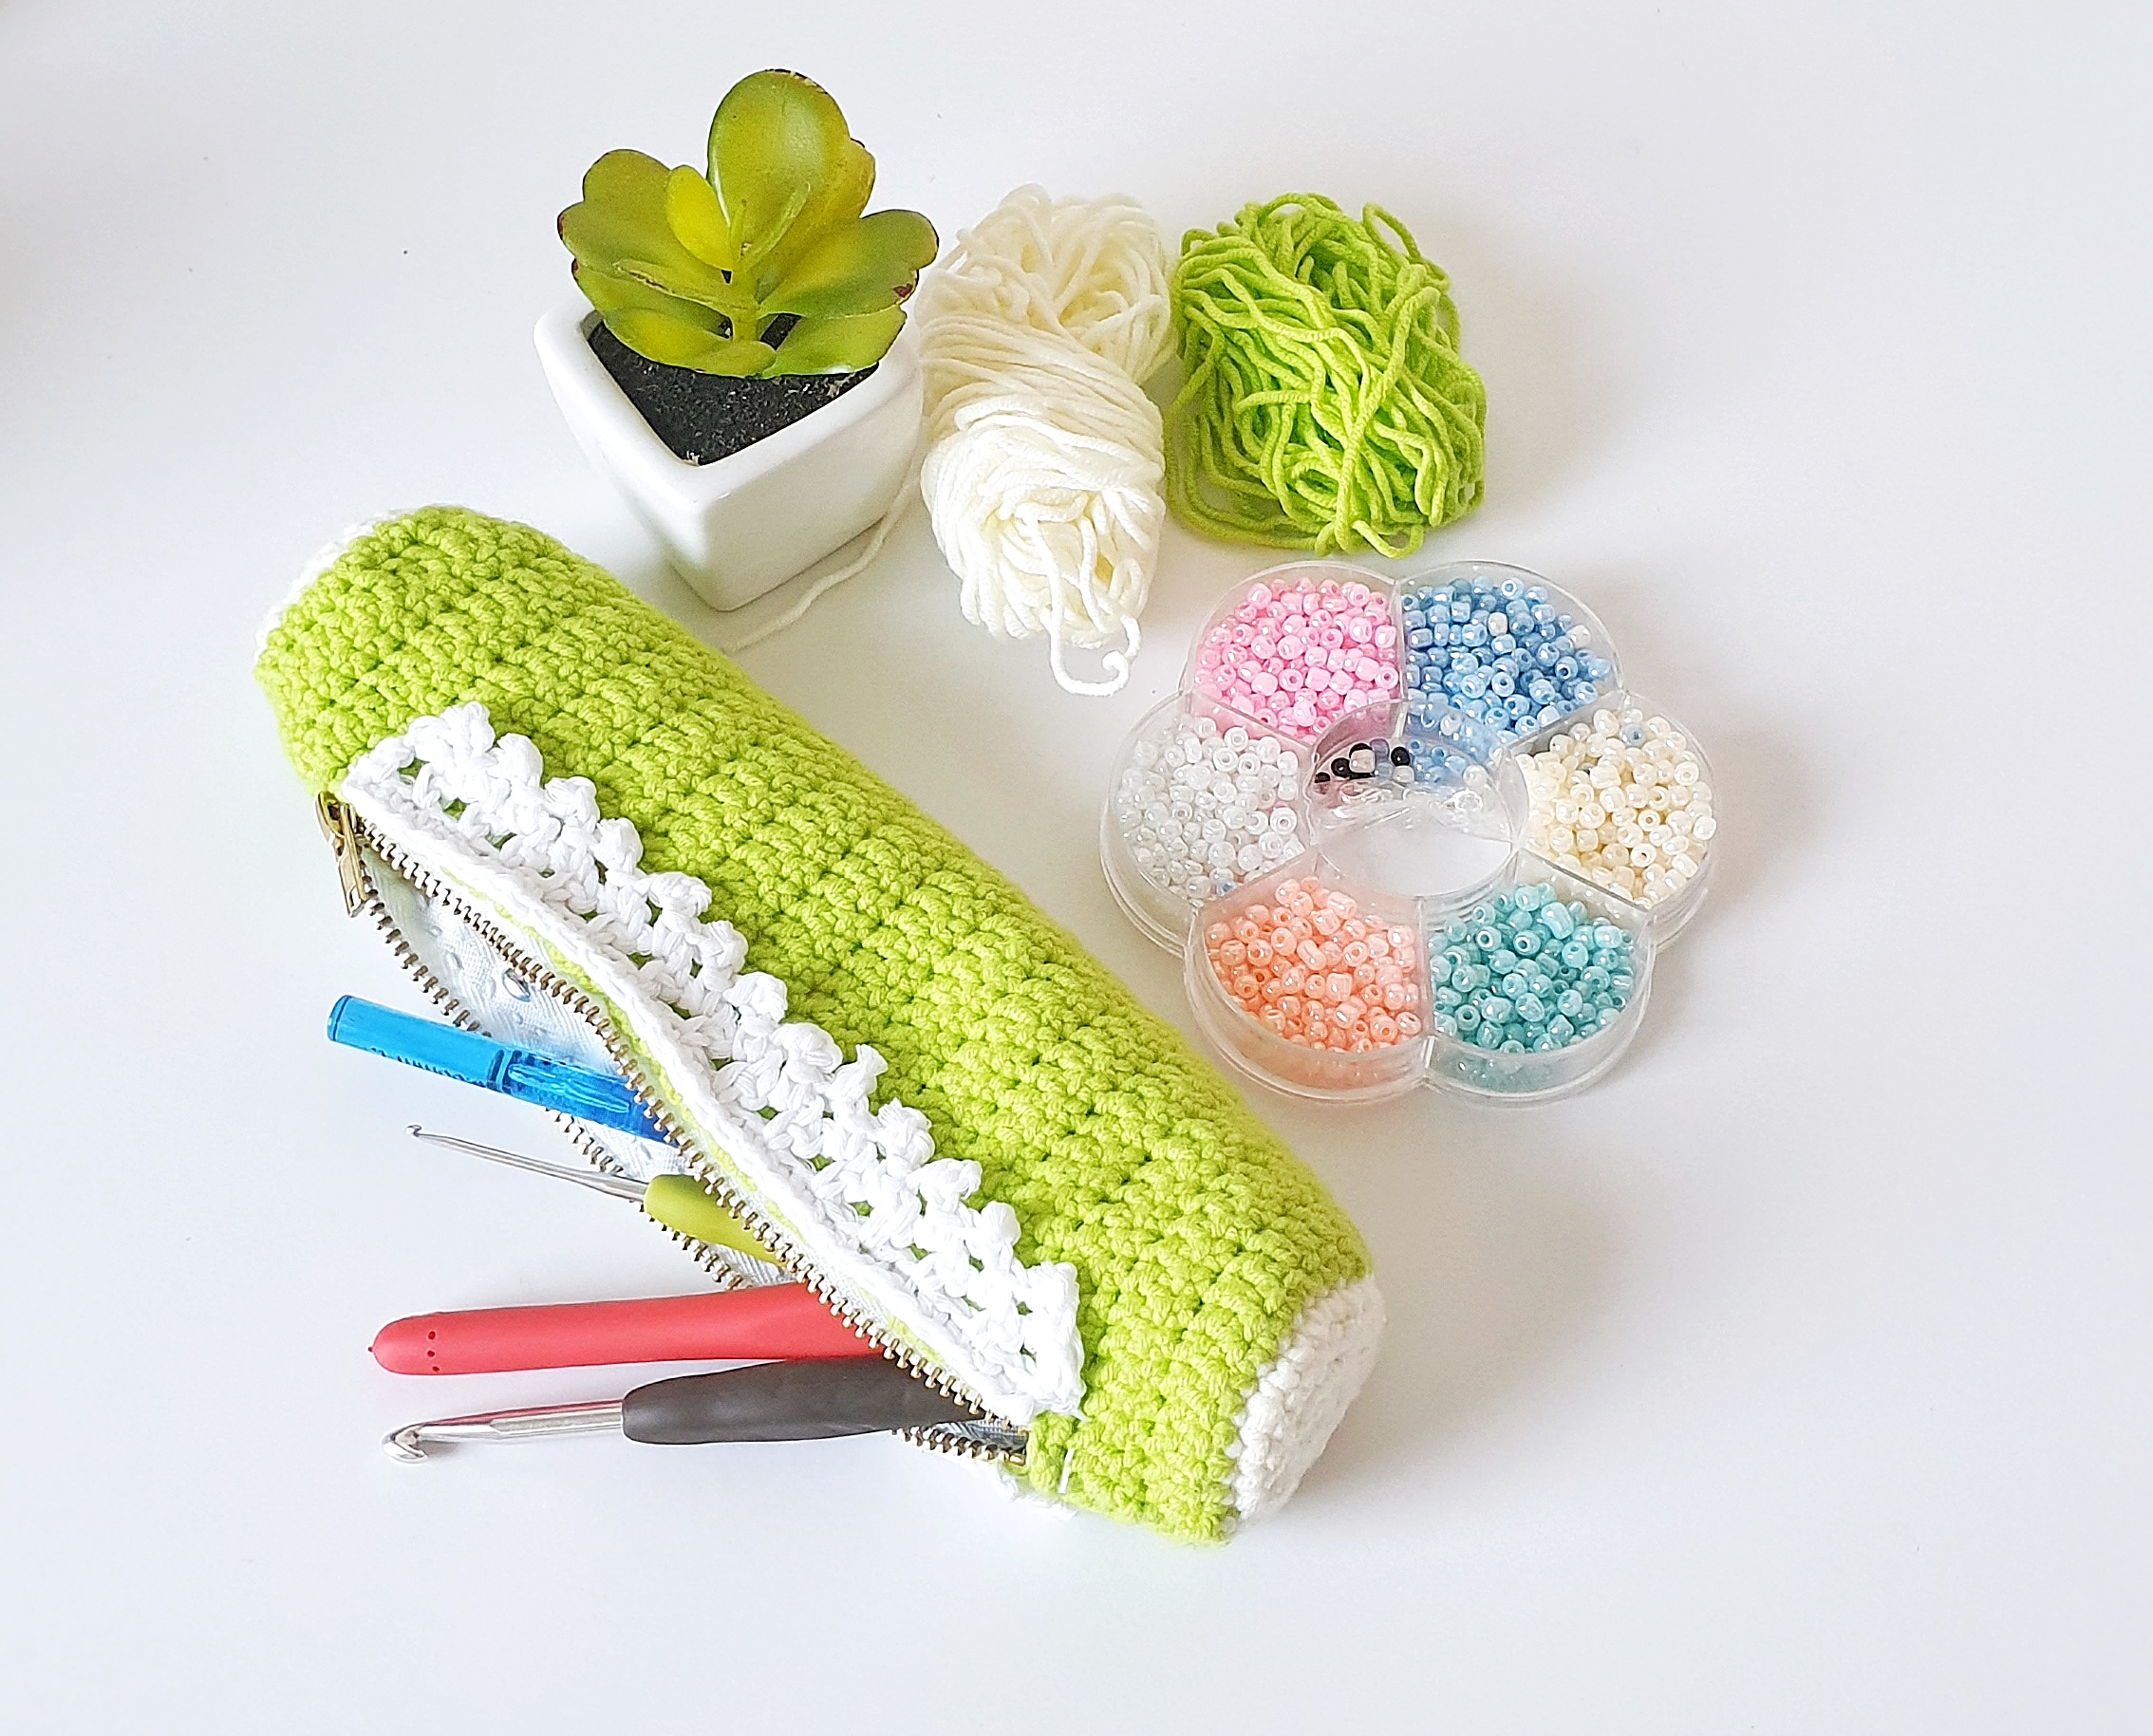
Materials:
- 720-1200, DK weight, medium 3 yarn. This pattern uses Paintbox yarns Metallic DK. Colour Daiquiri. Estimated number of balls per size, 6 (7, 7, 8, 8, 9, 9, 10)
- 3.5mm hook
- Tapestry Needle
- Stitch markers
Stitches/Abbreviation
- SC- single crochet
- CH- chain
- SC2TOG- single crochet decrease
- RS- right side
- WS- wrong side
Notes:
- The pattern uses U.S terms
- Always refer to the size table guide
- Sizing in bracket begins from XS (S,M,L,1XL,2XL,3XL to 4XL)
- The terms ‘Ch 3 loop’ and ‘loop’ are used interchangeably; it is refers to the same thing
PATTERN
BACK PANEL
Row 1: (leave a 6-8 inch tail before making the slip knot) chain number as in table guide, SC in 4th chain from hook, *Ch 3, skip 1 ch, SC in next. Repeat from * across. Turn
Row 2: *Ch 3, SC in Ch 3 loop. Repeat from * across. Turn
Rows 3- (refer to table): repeat row 2.
FRONT PANEL- make 2
Row 1: (leave a 6-8 inch tail on one panel) chain the number as in table guide, SC in 4th chain from hook, *Ch 3, skip ch, SC in next. Repeat from * across. Turn
Row 2: *Ch 3, SC In Ch 3 loop. Repeat from * across. Turn
Rows 3- 14(16, 18, 20, 24, 26, 28, 30): repeat row 2. turn
Row 15 (17,19,21,25,27,29,31): *Ch 3, SC in ch 3 loop. Repeat from * across. DO NOT work into last Ch 3 loop. Turn
Row 16 (18,20,22,26,28,30,32): *Ch 3, SC in ch 3 loop. Repeat from* across. Turn
Rows 17 (19,21,23,27,29,31,33)- 32 (34,36,38,40,42,44,46): repeat rows 15-16 (and for other sizes). Turn
Row 33 (35,37,39,41,43,45,47): *Ch 3, SC in ch 3 loop. Repeat from * across. DO NOT snip yarn on one of the panels.
MARKING PLACES/JOINING SHOULDER
- Lay back and front panels flat (the panel with the working yarn should be on the right side of your body)
- Mark out armholes at the sides of both front and back panels
- Mark out the opposite sides of the front panels with the same depth as the armhole. see photo 2
- On the front and back panels, mark out the shoulder in the last ch 3 loop on row 14(16, 18, 20, 24, 26, 28, 30). see photo 1
- With the 6 inch tail sew the shoulders of front and back panels, skipping the last ch 3 loop at the back. We will be doing a SC2tog in this later.

Close the front:
Continuing from the panel that has the working yarn, Ch 1 (mark this), turn *2SC in ch 3 loop, ch 1, repeat from * to the point of stitch marker, make 1 SC in last ch 3 loop.
Now work SC2together in the same ch 3 loop (where you made 1 SC) and the next ch 3 loop on the opposite panel. SC into same ch 3 loop (where you just did a SC2tog)
Working up on the left (opposite) panel the red arrows on photo 2 above points to chain 3 loops to work into
Ch 1, *2SC in ch 3 loop, ch 1, repeat from * till last Ch 3 loop at the shoulder, 1 SC into last ch 3 loop, SC2tog in same loop and next loop on back panel, 1 SC into same loop. see photo 3 above
Working on the back (shoulder):
Ch 1, SC in ch 3 loop, repeat this all the way to the last loop in opposite side of shoulder, SC in last loop, SC2tog in same loop and next ch 3 loop on front panel. Just as done in photo 3 above
Working down the right front panel:
SC in same ch 3 loop panel, Ch 1, *2SC in next ch 3 loop, ch 1. Repeat from * till Ch 1 from the beginning of round, Sl st in Ch 1, snip yarn. See photo 4 above.
CLOSING THE FRONT PANELS

Tip: the working yarn should be behind your hook.
Starting at the bottom, join yarn through loops on both panels, Ch 2, *slip stitch in left panel and through right panel, Ch 2, repeat from * across, last slp st in the last loop (same place you have the SC2tog). Snip yarn.
SLEEVES
Lay the top flat with right side facing up. Join yarn in marked loop.
Row 1: *Ch 3, SC in next ch 3 loop. Repeat from * till center of joined panels (see photo 2 below), SC2tog in last loop of back panel and 1st loop on front panel, continue to repeat from * across. Turn
Row 2: *Ch 3, SC in ch 3 loop. Repeat from * across. DO NOT work into last Ch 3 loop. Turn
Rows 3-7 (7,6,6,5,5,5,5): repeat row 2. Turn
Rows 8 (8,7,7,6,6,6,6)- 15 (15,17,19,23,23,25,25): *Ch 3, SC in ch 3 loop. Repeat from * across. DO NOT snip yarn
CLOSING THE SLEEVES AND SIDES

You can join this in two ways. 1, sew with tapestry needle. 2, use the same method as was done to join the front panels.
Tip: if you will follow the second method, place stitch markers into the ch 3 loops at both sides of the sleeves. It might be tedious, but it will help you align the rows perfectly. See photo 3 above
Turn to the WS, Ch 1, sl st through the 2 loops on the last row, *ch 1, slip st through opposite loop and next loop. Repeat from * across. See photo 3
Closing at the side: Sl st into 1st loop at the side (same place where we began the sleeves. Photo 4 ), *Ch 2, sl st through back and front loops. Repeat from * across. Snip yarn
Repeat the process for the second sleeve. Snip yarn, weave in tails. Block your top (advisable).
Enjoy!
Thank you for checking out this pattern. Kindly use the share buttons to spread the word. When you make one, do not be shy, share with us on instagram with #yarncraftee or join our private Facebook group to share your projects and find support.


You make the cutest clothes!
Thank you for your kind words.