
Hello craftee friends, I finally did something new- make two pattern designs out of one. This Ribbed Crochet Cardigan with pockets is the ‘sister’ to the Cosy Crochet Cardgian.
Purchase an AD-free version on Ravelry, Etsy or LoveCraftscom

When I first designed this Ribbed Crochet Cardigan with pockets, I made quite a number of error. It was my first cardigan design with a heavier yarn weight. For a lighter yarn weight cardigan you can see the Colour Stripe Cardigan.
As I went about fixing those errors, the result was Mel’s Cosy Crochet Cardigan. Thus, I had two cardigans that were similar yet different.

DIFFERENCES
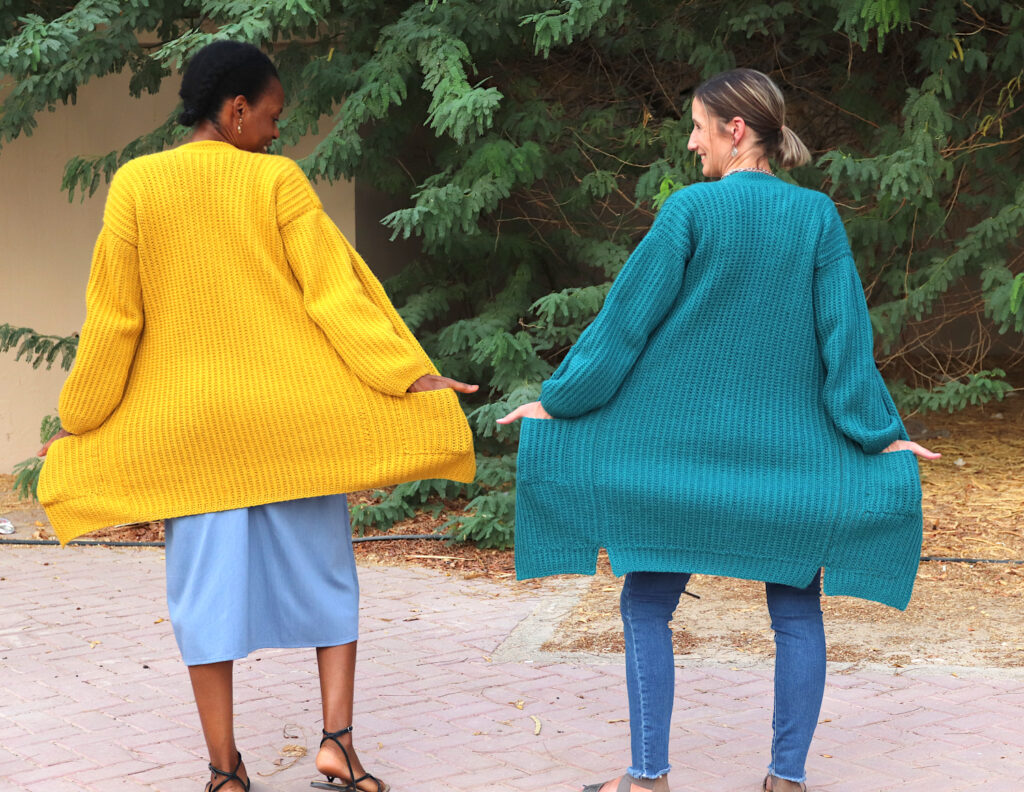
In this cardigan, the body is longer and has side slits. The pattern involves more joining as well because the bottom flaps are crocheted separately and sewn to the body of the cardigan. Also, the beginning of the Half Double Crochet rows are done differently.
Whereas, for Mel’s cosy crochet cardigan, the joining is less, the tapered bottom is crocheted right along with the body of the cardigan. However, there are no side slits and it is a shorter length than the ribbed crochet cardigan.
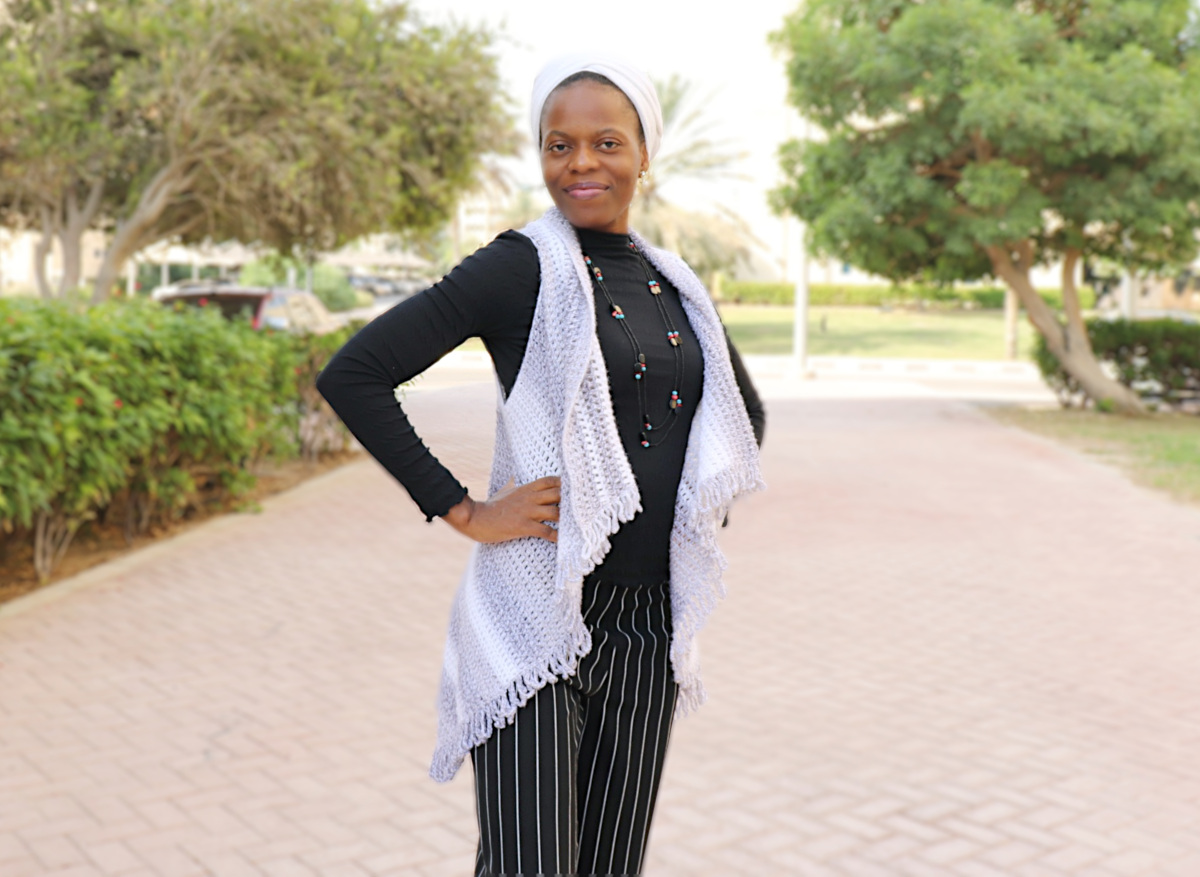
These differences are minor, however they give the cardigan two different looks as you can see in the photo. Personally, I like the longer one with the side slits more.
SIMILARITIES
Both of the cardigans follow the same ribbed crochet stitch pattern design. The sleeves and pockets are also done the same way.
I thought it would be good to share this pattern with you as well so that you can choose which of the cardigans to make.

CONSTRUCTION
This ribbed crochet cardigan with pockets is made in rows and parts that are joined together to form a whole. It is pretty simple to make with repetitive rows and simple stitches. For ease, I have divided it into eight parts to make the steps clearer:
- Part 1: back panel
- Part 2: right front panel
- Part 3: left front panel
- Part 4: bottom flaps
- Part 5: sleeves
- Part 6: join all the panels
- Part 7: connect the two front panels and shoulder
- Part 8- crochet pockets
- Lastly- Block! Block! Block! This makes a word of difference for your cardigan. If you used the same yarn as in this pattern, your cardigan will turn out really soft and it will be much more comfortable to wear.
MORE CROCHET PATTERNS TO WITH POCKETS
- Cosy Crochet Cardigan– sister to Ribbed Crochet Cardigan with Pockets
- Diagonal Pocket Shawl– gives your hands lots of cosy room
SHOP YARN CRAFTEE PATTERNS
SHOP YARN CRAFTEE PATTERNS
All patterns and materials shared on www.yarncraftee.com (unless otherwise stated) are copyright Bekisu Obomighie aka Rose Obom. Please read more on the Privacy Policy page. Thank you.
RIBBED CROCHET CARDIGAN with POCKETS
Disclosure– This post may contain affiliate links; from which Yarn Craftee will receive a commission should you make a purchase.
Size Guide
| Sizes | XS | S | M | L | 1XL | 2XL | 3XL |
| Starting chains | 124 | 126 | 126 | 128 | 128 | 130 | 130 |
| Bust (inches) | 28-30 | 32-34 | 36-38 | 40-42 | 44-46 | 48-50 | 52-54 |
| Approx. Cardigan length/width; inches (after blocking) | 32.5/18 | 33.2/19 | 33.2/20 | 33.5/21 | 33.5/21.5 | 34.2/22.5 | 34.2/23.5 |
| Armhole (by stitches) on each panel | 26 | 27 | 28 | 30 | 32 | 33 | 34 |
| Divide Front panels (upper/lower row) | 60/63 | 59/64 | 59/64 | 61/66 | 61/66 | 62/67 | 62/67 |
Gauge: 15 HDC stitches across × 16 rows = 4″
Materials:
- This pattern uses Aran weight yarn. Used for this pattern is Stylecraft Special Aran (value pack) Stylecraft Special Aran (single pack). Per size in meters 1,400 (1,570, 1,600, 1,770, 1,800, 1,960, 2000). Substitute with yarn that matches the gauge.
- 5mm hook
- Tapestry Needle
- Stitch markers (no stitch markers? substitute with hair pins)
- 2, 1inch diameter brown buttons
Stitches:
- HDC- half double crochet
- SC single crochet
- SL ST- slip stitch
- CH- chain
- RS- right side
- WS- wrong side
- FLO- front loop only (or in this pattern, third loop)
Notes:
- The Pattern uses U.S terms
- Ch 1 at the end of row does not count as stitch
- Pattern is written from smallest to largest; with larger number is parentheses, e.g, 24 (26,28,30…)
Save this pattern to Pinterest for later
Purchase an AD-free version on Ravelry, Etsy or LoveCraftscom
VIDEO TUTORIAL (please note that this tutorial mainly shows how to crochet the back and front panels for the ‘sister’ pattern. However, the tutorial covers every other detail needed to finish this Ribbed Cardigan pattern.
Part 1- Back Panel
See table for number of starting chains.
Row 1: Skip 1st ch, HDC in 1st ch and each ch across. ch 1, turn
Row 2: SC in FLO (3rd loop) of 1st st and each HDC sts across, till last st, SC in both loops of last st. Ch 1, turn
Row 3: HDC in 1st st and each st across. Ch 1, turn
Row 4: SC in FLO (3rd loop) of 1st st and each HDC sts across, till last st, SC in both loops of last st. Ch 1, turn
Rows 5-24 (26,28,30,30,32,34): repeat rows 3 & 4
Row 25 (27,29,31,31,33,35): HDC in 1st st, HDC into each st across till last 2 sts, skip last 2 sts. Ch 1, turn
Row 26 (28,30,32,32,34,36): SC in FLO (3rd loop) of 1st st and each st across till last st, SC in both loops of last st. Ch 1, turn
Row 27 (29,31,33,33,35,37): HDC in 1st st and each st across. Ch 1, turn
Rows 28 (30,32,34,34,36,38) – 45 (47,49,51,53,55,57), repeat rows 26 & 27, as well as for larger sizes. At the end of the last row, Chain 3, turn
Row 46 (48,50,52,54,56,58): skip 1 ch, SC into back bump of next 2 chs, SC in FLO (3rd loop) of each HDC sts across till last st, SC in both loops of last st. Ch 1, turn
Row 47 (49,51,53,55,57,59): HDC in 1st st and each st across. Ch 1, turn
Row 48 (50,52,54,56,58,60): SC in FLO (3rd loop) of 1st st and each st across till last st, SC in both loops of last st. Ch 1, turn
Rows 49 (51,53,55,57,59,61): HDC in 1st st and each st across. Ch 1, turn
Rows 50 (52,54,56,58,60,62) – 69 (73,77,81,83,87,91): repeat rows 48 & 49.
Part 2- Right Front Panel
Chain the same number as the back panel.
Row 1: Skip 1st ch, HDC in 1st ch and each ch across. ch 1, turn
Row 2: SC in FLO (3rd loop) of 1st st and each HDC sts across, till last st, SC in both loops of last st. Ch 1, turn
Row 3: HDC in 1st st and each st across. Ch 1, turn
Row 4: SC in FLO (3rd loop) of 1st st and each HDC sts across, till last st, SC in both loops of last st. Ch 1, turn
Rows 5-24 (26,28,30,30,32,34): repeat rows 3 & 4
DIVIDE THE STITCHES IN HALF. See table above for the how to divide the upper and lower rows. The next row is done on the lower half of the panel.
Row 25 (27,29,31,31,33,35): HDC in 1st st and into each st across till last 6 sts, SC across to the marked stitch. Ch 1, turn
Row 26 (28,30,32,32,34,36): 2SC into the first st, SC in FLO of next 5 sts, SC in FLO (3rd loop) of HDC sts till last st, SC in both loops of last st. Ch 1, turn
Row 27 (29,31,33,33,35,37): HDC in 1st st and each st across till last 7 sts, SC across, 2SC in last st. Ch 1, turn
Row 28: (30,32,34,34,36,38): 2SC into the first st, SC in FLO of next 7 sts, SC in FLO (3rd loop) of HDC sts till last st, SC in both loops of last st. Ch 1, turn
Row 29 (31,33,35,35,37,39): HDC in 1st st and each st across till last 9 sts, SC across, 2SC in last st. Ch 1, turn
Row 30: (32,34,36,36,38,40): 2SC into the first st, SC in FLO of next 9 sts, SC in FLO (3rd loop) of HDC sts till last st, SC in both loops of last st. Ch 1, turn
Row 31 (33,35,37,37,39,41): HDC in 1st st, and each st across till last 11 sts, SC across, 2SC in last st. Ch 1, turn
Row 32: (34,36,38,38,40,42): 2SC into the first st, SC in FLO of next 11 sts, SC in FLO (3rd loop) of HDC sts till last st, SC in both loops of last st. Ch 1, turn
Row 33 (35,37,39,39,41,43): HDC 1st st and each st across till last 13 sts, SC across, 2SC in last st. snip yarn.
Part 3- Left Front Panel
Chain the same number as the back panel.
Row 1: Skip 1st ch, HDC in 1st ch and each ch across. ch 1, turn
Row 2: SC in FLO (3rd loop) of 1st st and each HDC sts across, till last st, SC in both loops of last st. Ch 1, turn
Row 3: HDC in 1st st and each st across. Ch 1, turn
Row 4: SC in FLO (3rd loop) of 1st st and each HDC sts across, till last st, SC in both loops of last st. Ch 1, turn
Rows 5-24 (26,28,30,30,32,34): repeat rows 3 & 4
DIVIDE THE STITCHES. Just as you did for the Right Front panel, mark the stitch.
Row 25 (27,29,31,31,33,35): with wrong side of last row facing up, join yarn in marked st. Ch 1, SC in same st and next 5 sts. HDC across. Ch 1, turn
Row 26 (28,30,32,32,34,36): SC in first st, SC in FLO (3rd loop) of next st and each st across till last 6 sts, SC in FLO of 5 sts, 2SC in both loops of last st. Ch 1, turn
Row 27 (29,31,33,33,35,37): 2SC in 1st st, SC in next 6 sts, HDC across. Ch 1, turn
Row 28: (30,32,34,34,36,38): SC in first st, SC in FLO (3rd loop) of next st and each st across till last 8 sts, SC in FLO of 7 sts, 2SC in both loops of last st. Ch 1, turn
Row 29 (31,33,35,35,37,39): 2SC in 1st st, SC in next 9 sts, HDC across. Ch 1, turn
Row 30: (32,34,36,36,38,40): SC in first st, SC in FLO (3rd loop) of next st and each st across till last 10 sts, SC in FLO of 9 sts, 2SC in both loops of last st. Ch 1, turn
Row 31 (33,35,37,37,39,41): 2SC in 1st st, SC in next 11 sts, HDC across. Ch 1, turn
Row 32: (34,36,38,38,40,42): SC in first st, SC in FLO (3rd loop) of next st and each st across till last 12 sts, SC in FLO of 11 sts, 2SC in both loops of last st. Ch 1, turn
Row 33 (35,37,39,39,41,43): 2SC in 1st st, SC in next 12 sts, HDC across. Ch 1, turn
Part 4- Bottom Flaps– All sizes
Back Panel
Row 1: Ch 11, SC in 2nd ch from hook and next 3 chs, HDC in across. Ch 1, turn
Row 2: SC in FLO (3rd loop) of 1st st and each st of HDC, SC into FLO of next 3 sts, SC under both loops of last st. Ch 1, turn
Row 3: SC in 1st st and next 3 sts, HDC across. Ch 1, turn
Rows 4- 69 (73,77,81,83,87,91): repeat row 2 & 3.
Front Panels
Right Front Panel
Row 1: Ch 11, SC in 2nd ch from hook and next 3 chs, HDC in across. Ch 1, turn
Row 2: SC in FLO (3rd loop) of 1st st and each st of HDC, SC into FLO of next 3 sts, SC under both loops of last st. Ch 1, turn
Row 3: SC in 1st st and next 3 sts, HDC across. Ch 1, turn
Rows 4-33 (35,37,39,39,41,43): repeat row 2 & 3.
Left Front Panel
Row 1: Ch 11, HDC in 2nd ch from hook and next 5 chs, SC across remaining chs. Ch 1, turn
Row 2: SC in 1st st, SC in FLO of next 3 sts, SC in FLO (3rd loop) of HDC sts till last st, SC in both loops of last st. ch 1, turn
Row 3: HDC in 1st st and next 5 sts, SC in across. Ch 1, turn
Rows 4- 33 (35,37,39,39,41,43): repeat row 2 & 3.
Part 5- Sleeves
Tip- keep your slip stitches loose to make them easy to work into.
Row 1- Chain 76 (78,80,84,84,86,86), skip 1st ch, sl st in 4 chs, SC in 6 chs, HDC across till last 6 chs, SC in last 6 chs. Ch 1, turn.
Row 2- SC in FLO of 1st st and next 5 sts, SC in FLO (3rd loop) of the HDC sts, SC in FLO of next 6 sts, Sl St in FLO of next 3 sts, Sl St in both loops of last st. Ch 1, turn
Row 3- Sl St in FLO of 1st st and next 3 sts, SC in 6 sts, HDC across till last 6 sts, SC in last 6 sts. Ch 1, turn
Rows 4-51 (53,55,59,63,65,67): repeat rows 2 & 3. Snip yarn, leave long tail to sew sleeve
Part 6- Join all panels
When joining the sleeve please see this video tutorial; timestamp 37:23. It will guide you on the right way to sew the sleeve to the body.
When joining the bottom flaps to the body of the ribbed crochet cardigan, match the stitch rows on bottom flaps with the body of the cardigan and sew.
- Ensure that the ‘ribbed’ rows on the bottom flap align with the ribbed rows on the body; this will help you know where to be joining the stitches (because the bottom flaps will appear shorter that the rows on the body but will stretch after blocking).
- Join flaps to the body of cardigan at the bottom only, do not join the sides; this should be left open.
Part 7- Connect the two front panels
With front of cardigan facing up, skip 1st st, join yarn in next stitch.
Row 1: join yarn in st., SC in same st, and each st across, SC into the 1st 2 sts on the back panel.
At the back, SC into each st row.
On opposite side, SC into each st across, till last 2 sts, skip next, SC into last st. Ch 1, turn
Row 2: SC in 1st st, skip next st, SC in FLO of each st across till last 2 sts. skip next st, SC in last st. Ch 1, turn
Row 3: SC in 1st st, skip next st, SC into each st across till last 2 sts, skip next st, SC in last st. Ch 1, turn.
Rows 4-8: repeat rows 2&3. At the end of row 8, chain 7 (1st button loop made).
Row 9: Repeat row 3. Do not snip yarn, continue to make the 2nd Button Loop.
Ch 7, sl st into next st row. SC into each st row down, skip the skipped st on row 1, SC across the lower half stitch rows till last 2 rows, sl st in next st row, snip yarn leaving 4inch tail to sew button.
Trim Opposite Button Loop- skip 1 stitch row, join yarn in 2nd st row (leave a 4 inch tail to sew button), SC in next st row and across, skip the same skipped st on row 1, SC across the upper half stitch rows, Sl st in row before the last row (that is row 8 where we made the 1st button loop). Snip yarn, weave in tails. Sew the buttons.
Part 8- Pockets
Sizes XS, S, M
Row 1: Chain 26, skip 1st ch, SC into each ch across. ch 1, turn
Row 2: HDC into each st across. ch 1, turn
Row 3: SC in FLO of 1st st, and each st across till last st. SC in both loops of last st.
Rows 4-19 (21,21): repeat rows 2&3. Ch 1, turn
Sizes L, 1XL
Row 1: Chain 28, skip 1st ch, SC into each ch across. ch 1, turn
Row 2: HDC into each st across. ch 1, turn
Row 3: SC in FLO of 1st st, and each st across till last st. SC in both loops of last st.
Rows 4-21 (21): repeat rows 2&3. Ch 1, turn
Sizes 2XL, 3XL
Row 1: Chain 30, skip 1st ch, SC into each ch across. ch 1, turn
Row 2: HDC into each st across. ch 1, turn
Row 3: SC in FLO of 1st st, and each st across till last st. SC in both loops of last st.
Rows 4-23 (23): repeat rows 2&3. Ch 1, turn
Sew pockets on. Count from bottom row stitch up to 23 stitches, position the pockets in the center of the cardigan and sew.
BLOCK YOUR CARDIGAN
Blocking your cardigan will go a long way in creating the final look. It will also iron out the kinks from sewing and straighten the edges from the different stitches used. Please, block your cardigan.
Thank you for checking out this pattern. Kindly use the share buttons to spread the word. When you make one, do not be shy, share with us on instagram with #yarncraftee or join our private Facebook group to share your projects and find support.


I tried, I really did. but this pattern is not explained in a way that would let people understand it. There’s also a mistake with size M, the stitches you have to split the panels with is inaccurate
I am sorry to know that you are having trouble with this pattern. Perhaps the video tutorial on Yarn Craftee youtube channel might help?
Hi Rose,
How much yarn do I need to purchase to crochet the ribbed crochet cardigan size medium?
Thanks for your time. Love this pattern!
Darlene
Hi Rose! Love your designs. Saving for later on Pinterest, but will definitely buy the pattern when I’m able to start. Thank you for sharing!
I hope you find time to make it. Thank you for stopping by.