
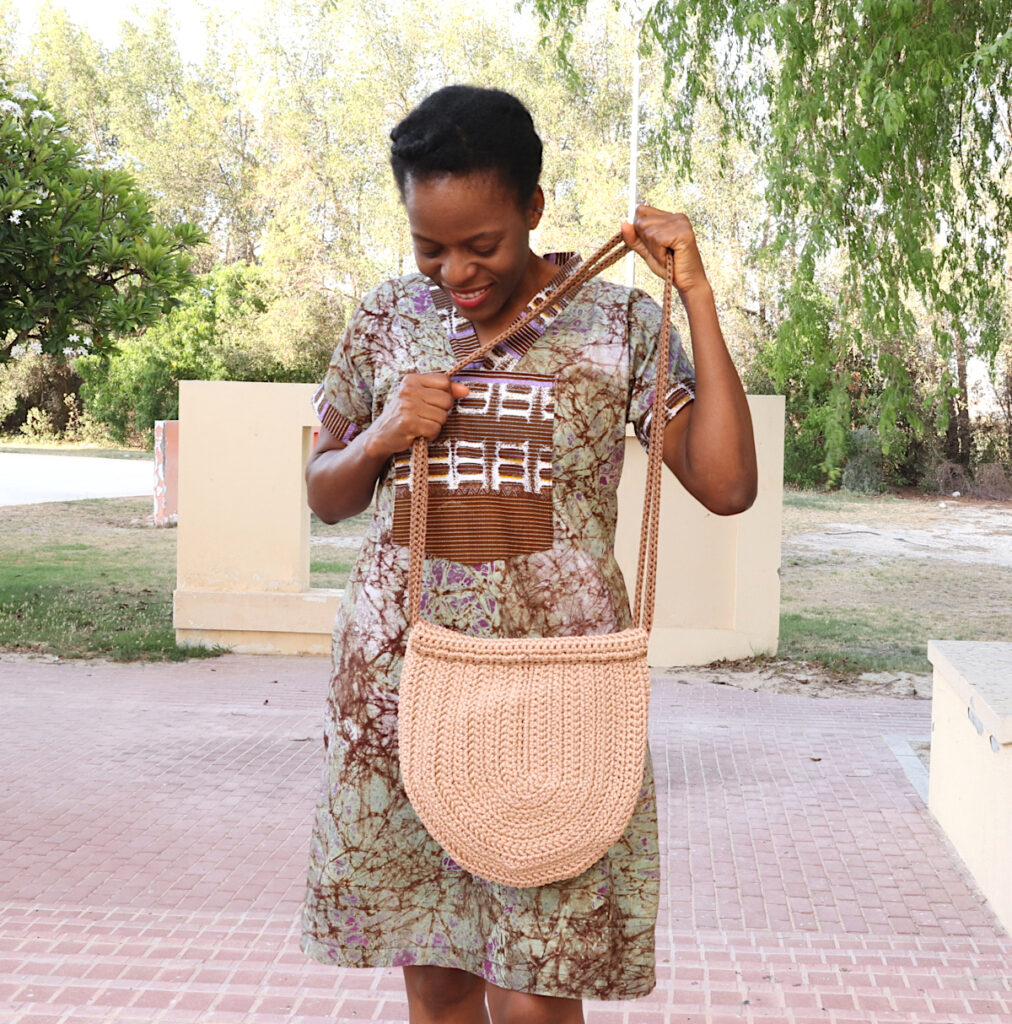
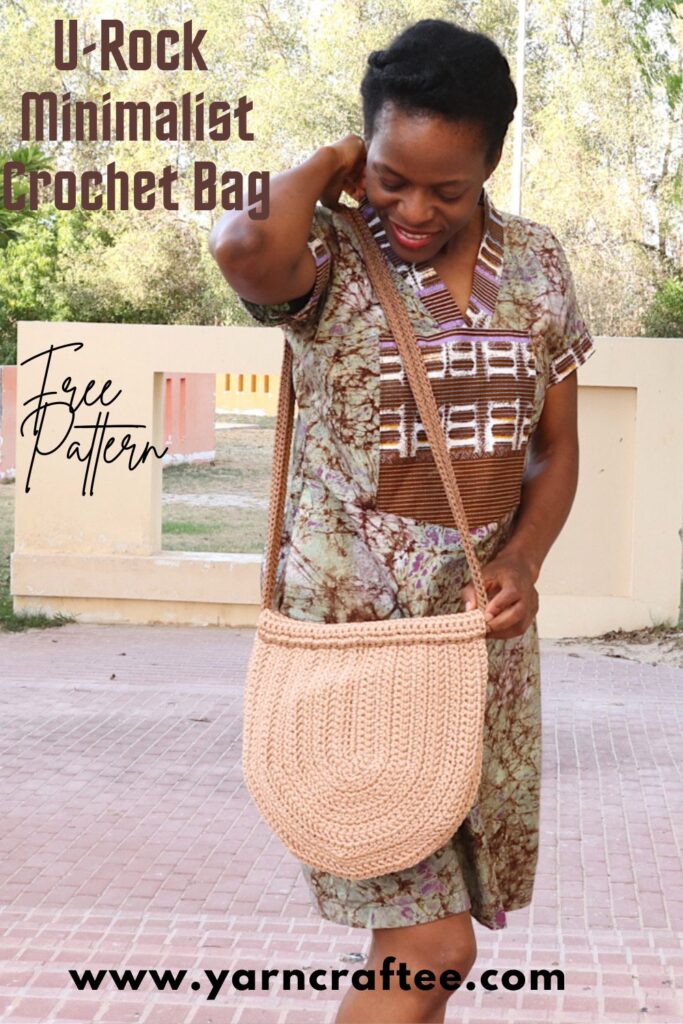
Looking for a minimalist crochet project that’s both functional and fashionable? The U-Rock Minimalist Crochet Bag is just that. With its clean and simple stitching, this crochet bag is a nice blend of practical use and durability.
Purchase an AD-Free version on Ravelry, Etsy
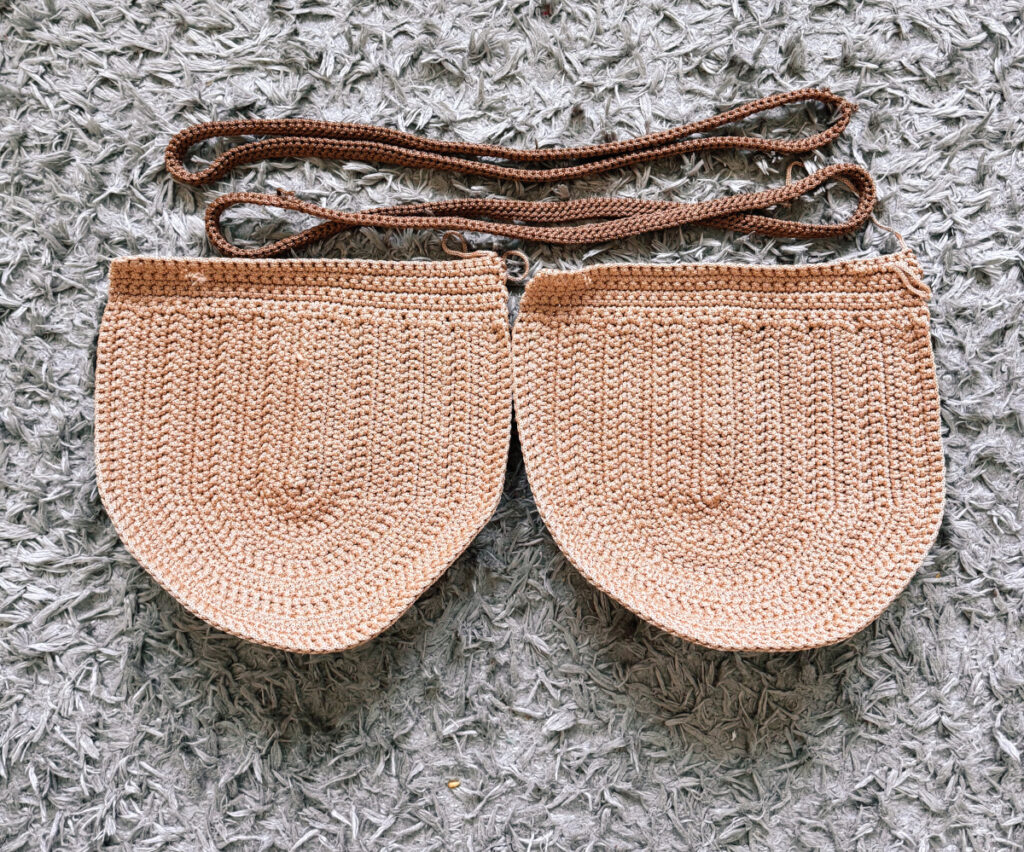
The U-Rock minimalist crochet bag is made with simple double crochet and simple crochet stitches in a semi round manner to create a classic U-shaped piece. The easy stitching makes this project a
This modern crochet bag can be used in many different ways, whether you are heading out to grocery shop, the beach, or just hanging out with friends, the U-Rock crochet bag is a special handmade piece to carry along.
CONSTRUCTION
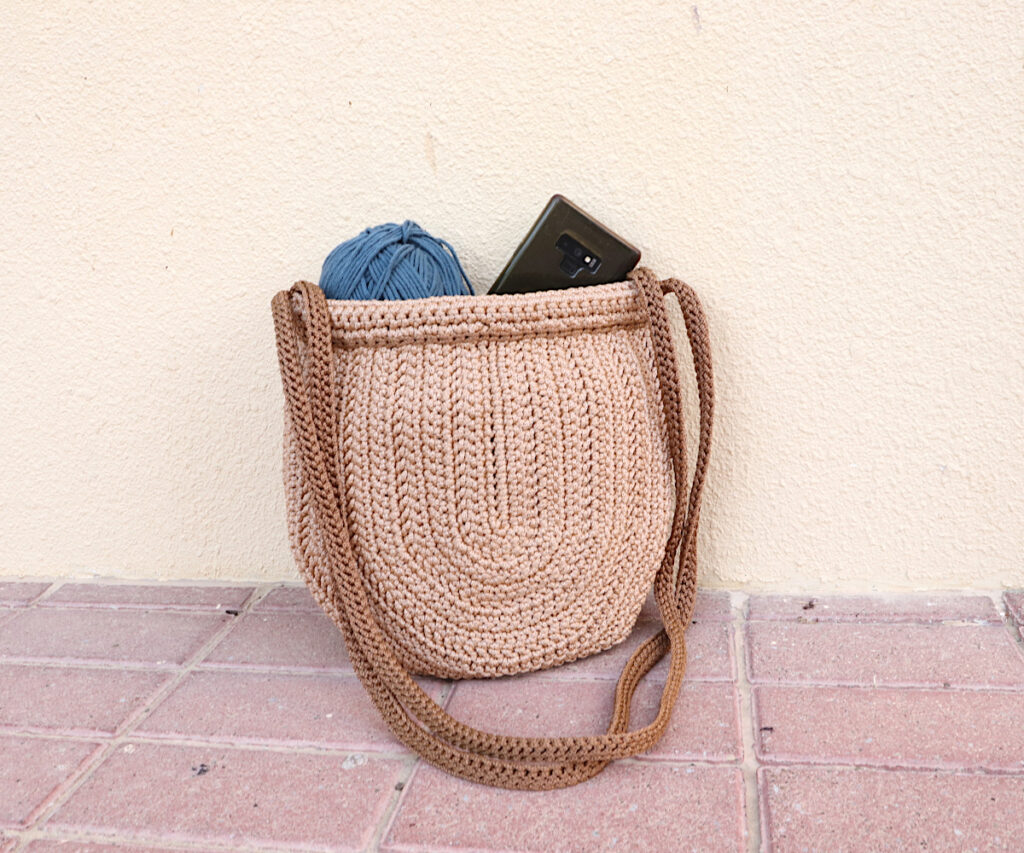
The U-Rock Minimalist Crochet Bag is made with basic single and double crochet stitches. It requires two panels, which are then joined at the sides, followed by the handles, which are seamed into the flap at the top of the bag.
YARN
The U-Rock crochet bag can be made with aran weight or chunky weight yarn in cotton or polyester (macrame) fibre. In this version, a macrame yarn type was used. You could also use one colour for the entire bag or use two contrasting colours for a striking aesthetic.
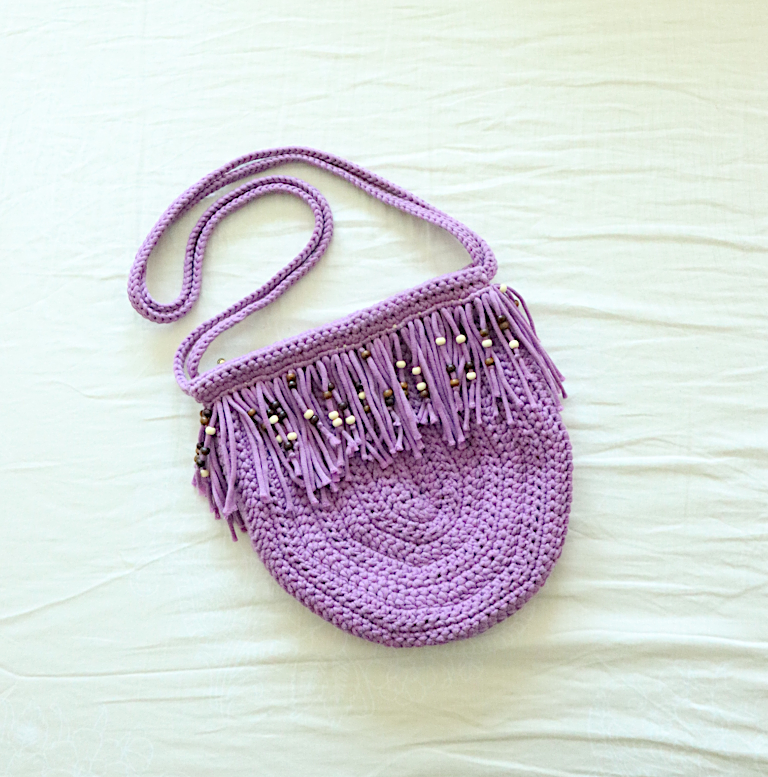
Did you know that you can add more features to the U-Rock Minimalist Crochet Bag? Features like adding a lining, adding fringes and beads (should you prefer a hippie/boho vibe). All of that is included in the AD-free version, which you can find here.
Explore Minimalist Crochet Patterns
SHOP YARN CRAFTEE PATTERNS
All patterns and materials shared on www.yarncraftee.com (unless otherwise stated) are copyright Bekisu Obomighie aka Rose Obom. Please read more on the Privacy Policy page. Thank you.
FREE PATTERN- U-ROCK MINIMALIST CROCHET BAG
Disclosure– This post may contain affiliate links; from which Yarn Craftee will receive a commission should you make a purchase.
Finished Size:
The body- (from centre of the bag) 11.5 inches
With handle- (from centre of the bag)- 30.5 inches
Gauge: 6 rounds= 2 inches
Materials:
- Aran or Chunky Weight yarn- (Cotton or Macrame) Yarn used here is YarnArt Macrame XL- 300 mtrs. Substitute with Hoooked Ribbon XL solids
- 5 or 5.5mm hook (or any hook that is comfortable to use with your yarn of choice)
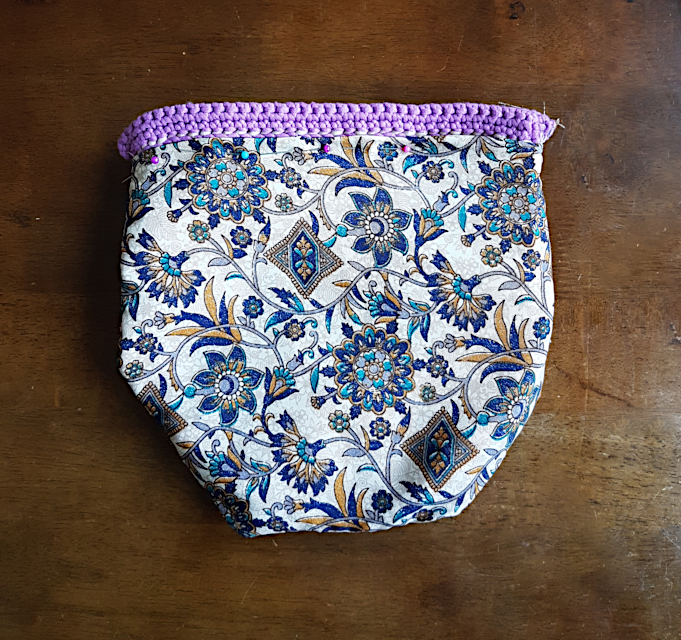
- 11 to 12 inches zip
- Pins to hold zip in place
- Tapestry needle
- Sewing needle
- Scissors
Stitches/Abbreviation:
- SC- single crochet
- DC- double crochet
- SL ST- slip stitch
- CH- chain
- REM- remaining
Notes:
- The pattern uses U.S terms
- Chain 1 at the beginning of the row does not count as a stitch unless otherwise stated
- Pattern is worked in semi-round
Purchase an AD-Free version on Ravelry, Etsy
PATTERN
BODY- Make 2
Row 1: Chain 19, SC in 2nd chain from hook, and nxt 16 chs, 3 SC in last st, turn upside down so that bottom of chains is up, SC in the next 17 chs (including that 1st ch with the 1st SC). Ch 1, turn -37 sts. Place a stitch marker into the last st there.
Row 2: SC in 1st st and nxt 16 sts, 2SC each in nxt 3 sts, SC in rem 17 sts. Ch 1, turn – 40 sts
Row 3: DC in 1st st and nxt 16 sts, (2DC in nxt st, DC in nxt st) 2 times, DC in nxt st, 2DC in nxt. DC in rem 17 sts. Ch 1, turn -43 sts
Row 4: DC 1st st and nxt 16 sts, (2DC in nxt st, DC in nxt 3 sts) 2 times, 2DC in next st, DC in rem 17 sts. Ch 1, turn – 46 sts
Row 5: SC in 1st st and nxt 16 sts (2SC in nxt st, SC in nxt 3 sts) 3 times, SC in rem 17 sts. Ch 1, turn – 49 sts
Row 6: SC in 1st st and nxt 16 sts, (2SC in nxt, SC in nxt 6 sts) 2 times, 2SC in nxt st, SC in rem 17 sts. Ch 1, turn – 52 sts
Row 7: DC in 1st st and nxt 16 sts, (2DC in nxt, DC in nxt 5 sts) 3 times, DC in rem 17 sts. Ch 1, turn – 55 sts
Row 8: DC in 1st st and nxt 16 sts, (2DC in nxt, DC in nxt 9 sts) 2 times, 2DC in nxt st, DC in rem 17 sts. Ch 1, turn – 58 sts
Row 9: SC in 1st st and nxt 16 sts, (2SC in nxt, SC in nxt 7 sts) 3 times, SC in rem 17 sts. Ch 1, turn – 61 sts
Row 10: SC in 1st st and nxt 16 sts, (2SC in nxt, SC in nxt 12 sts) 2 times, 2SC in nxt st, SC in rem 17 sts. Ch 1, turn – 64 sts
Row 11: DC in 1st st and nxt 16 sts, (2DC in nxt, DC in nxt 9 sts) 3 times, DC in rem 17 sts. Ch 1, turn – 67 sts
Row 12: DC in 1st st and nxt 16 sts, (2DC in nxt, DC in 15 sts) 2 times, 2DC in nxt st, DC in rem 17 sts. Ch 1, turn – 70 sts
Row 13: SC in 1st st and nxt 16 sts, (2SC in nxt, SC in nxt 11 sts) 3 times, SC in rem 17 sts. Ch 1, turn- 73 sts
Row 14: SC in 1st st and nxt 16 sts, (2SC in nxt st, SC in 18 sts) 2 times, 2SC in nxt st, SC in rem 17 sts. Ch 1, turn – 76 sts
Row 15: DC in 1st st and nxt 16 sts, (2DC in nxt, DC in nxt 13 sts) 3 times, DC in rem 17 sts. Ch 1, turn – 79 sts
Row 16: DC in 1st st and nxt 16 sts, (2DC in nxt, DC in nxt 14 sts) 3 times, DC in rem 17 sts. Ch 1, turn – 81 sts
Row 17: SC in 1st st and each at around. DO NOT SNIP YARN. Proceed to making the flap for the zip and handles.
FLAP FOR ZIP & HANDLE
Row 1: Chain 1 (counts as a stitch- place a stitch marker here) SC in the nxt st and each stitch row to the centre, where you have the stitch marker on Row 1 (you should have 17 SCs- plus that ch 1 at the beginning), Ch 1, SC into the rem 17 stitch rows across; making 1 SC per stitch row.
You will have 17 SCs on one side (including the Ch 1) Ch 1, in the centre, and 17 SCs on the other side. Altogether, 35 SCs. Ch 1, turn
Row 2: SC in 1st st and each st across (including the chain 1 in the centre), finish with SC in the last Ch 1 at the beginning of row 1. Ch 1, turn
Row 3: SC in 1st st and each st across. Ch 1, turn
Rows 4-6: repeat row 3
HANDLES– make 2
Ch 184
Row 1: working in the back bump of the chains, Sl st in 2nd ch from hook and each ch across. Ch 1, turn
Row 2: in FLO, Sl st in 1st st and each st across except the last st, Sl st under both loops of the last st. Snip yarn, leaving long tail to sew to the other end of the handle.
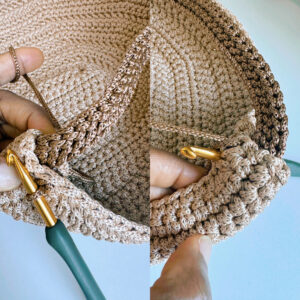
JOIN HANDLE TO BODY
Note- you will be working into the same stitch row as you did for Row 1 when making the flap. Also, take note of the Ch 1 on that row, we will be working into the stitch below it.
Place handle inside flap. Fold the flap. Join yarn in the side of the 1st row, and through the 1st st on the last row with a Sl st. Continue to close the flap by joining the through each st with a Sl st.
ASSEMBLE
Place pieces side by side, with the isides facing out. We will begin to join from the 2nd stitch (after the Row 1 of the Flap), all the way to the opposite side. Snip yarn, Weave in tails.
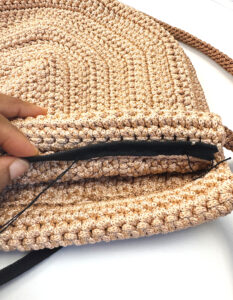
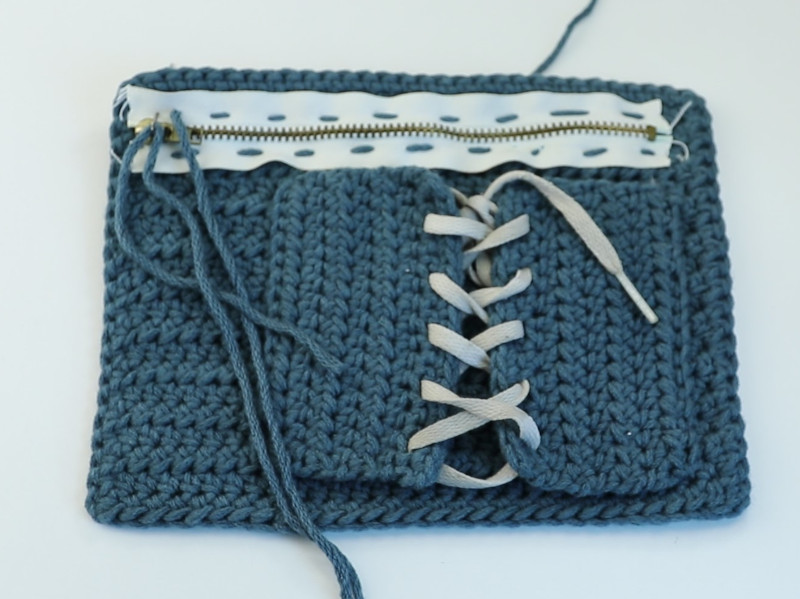
SEW ZIP
Take your time for this step, as it may be a little challenging if you are not used to it.
- We want to sew the zip to the flap, using the line of the slip stitches as a guide.
- You can use holding pins to align zip to the bag.
- Try to make the zipper well aligned inside the purse.
Enjoy your bag!
Thank you for checking out this pattern. Kindly use the share buttons to spread the word. When you make one, do not be shy, share with us on instagram with #yarncraftee or join our private Facebook group to share your projects and find support.


Does Row 2 turn because it doesn’t say to but I don’t see how it would work otherwise.
It does turn. Thank you for bringing it to attention, it is now updated.